Hardest time joining a bookmatch

tangimango

Well-known member
Joined
Jan 26, 2013
Messages
811
Reaction score
1
Location
Honolulu/Hawaii
im having the hardest time trying to join a bookmatch top.

what method do you guy use for a gap free joint?

ive only used the sandpaper on flat board method and is not working for me. i can do it with thicker boards but this one is around 2.5mm, the thinner it is the harder to joint?
 
This topic was covered in detail recently. Try searching for Chuck Moore's jointing method using a spiral bit in a router table. I use that method and it works great, first time every time.
 
A good plane is what you need. Without it, jointing is hopeless. With it, it's effortless. Perfectly flat sole, perfectly sharp blade, small mouth opening, and set for fluffy thin shavings. I made my own out of wood, and the light weight makes it more pleasant as well.

And if jointing backs that have a bit of curvature so there's no way to avoid going against the grain for part of it, a chipbreaker set less than a hair's width from the blade edge will take care of that as well. My plane has one of these Hock blades, that come with a ready-to-use chipbreaker http://www.hocktools.com/PI.htm (but the blade itself still needs work)
 
Last edited:
For me using a plane was a learned skill, not easy to get good results right off the bat, something you (I) have to work at. Chuck's router method, no brainer
 
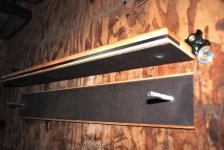
I really need to write this up but I don't have the time right now. Maybe with a these couple 'o pics you can figure it out. Basically the wood plates are clamped in the jig and run against a spiral router bit (Eagle America part # 120-0402)..
First time, every time, perfect. No brainer.
 

Attachments

  • plate1.jpg
    plate1.jpg
    86.3 KB · Views: 157
  • plate2.jpg
    plate2.jpg
    92.8 KB · Views: 149
Here is the recent post that discusses this subject...

http://forum.ukuleleunderground.com...Level-to-Join-Top-Plates&highlight=foot+level

There is more than one way make this joint and Chuck's is probably the quickest and surest. Zip zip. The shooting board and plane works like a champ too if you have the chops for tuning planes. The one thing I have found is that holding and running the wood on a flat surface of sand paper does not work. The problem is the more you sand the more you rock no matter how hard you try not too and you get a convex surface and that does not work. For me the 3 foot level thing works great. I've get a perfect invisible joint using it. It is slow and tedious though. However, the thing to keep in mind is to not glue the joint until it is perfect.

Here is another idea too I got out of a guitar building book: Stack your plates upside down and backwards and then plane or rout or sand them (what ever) at a slight angle (say 10 degrees off vertical), flip over and reverse your plates and you have created a slight scarf joint that will give you a better line. The advantage is that you also have more gluing surface making a stronger joint. I've never tried it with a musical instrument, but I've done it doing carpentry and it is the way to go. Thinking upside down and backwards gives me a headache.

Also, making a joint with a such thin plates has to be challenging. Why so thin?
 
Well, using only a stationary sander and plain sand paper is definitely more difficult. Those of you who say it can't be done, well it can, and it can be done well if you use the right technique and are patient. Sanding very thin plates it not easy and jointing is best done before the plates are thicknessed. There many ways to do many jobs, just have to find out what works for you.
 
The one thing I have found is that holding and running the wood on a flat surface of sand paper does not work.
. . . .
Also, making a joint with a such thin plates has to be challenging. Why so thin?
There's a very good reason to run a bookmatched joint across sandpaper. Again, one of those little things.

Personally, I joint as thin as I can, usually around 115", because that's where I mill at. No issues, Spanish style. I've modified the jig a little so the plates don't flex. I guess I'll post it in the Out of box thread someday for those interested.
 
Last edited:
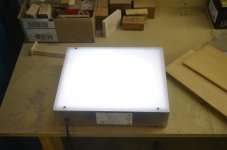
I run the plates through a jointer first. Then I use a small light table to check for gaps between the plates--the table holds the plates flat for an accurate assessment. Any "light gaps" are corrected by a few swipes over sandpaper on a flat surface using a 90 degree fence.

lightbox.jpg gap.jpg nogap.jpg
 
I really need to write this up but I don't have the time right now. Maybe with a these couple 'o pics you can figure it out. Basically the wood plates are clamped in the jig and run against a spiral router bit (Eagle America part # 120-0402)..
First time, every time, perfect. No brainer.

Hi Chuck. Many thanks for the photos. I'm in the process of making one of these jigs, but just wondering what the black material used to sandwich the plates is? It looks like thin neoprene rubber, but could possibly be wet & dry type abrasive? I guess both would work, and I've got both available, but thought it worth asking.
 
Hi Chuck. Many thanks for the photos. I'm in the process of making one of these jigs, but just wondering what the black material used to sandwich the plates is? It looks like thin neoprene rubber, but could possibly be wet & dry type abrasive? I guess both would work, and I've got both available, but thought it worth asking.

It's either 80 or 120 grit sandpaper--ends from my drum sanding rolls.
 
Top Bottom