Build #3, Log

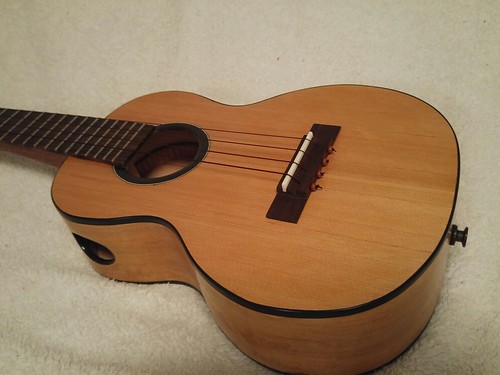
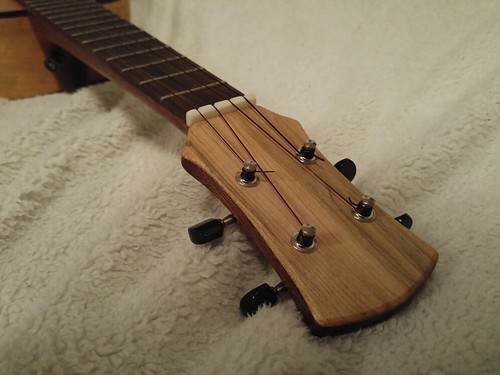
After a lot of waiting, the shellac finally arrived. Thus my build could continue but I've been feeling a little out of game. Lots of small mistakes, cockups and general sloppiness meant that I for a while thought I wouldnt get this uke together. I managed to destroy two rosettes in the process of finishing the top. Finally got one together, which goes well with my intended design scheme.

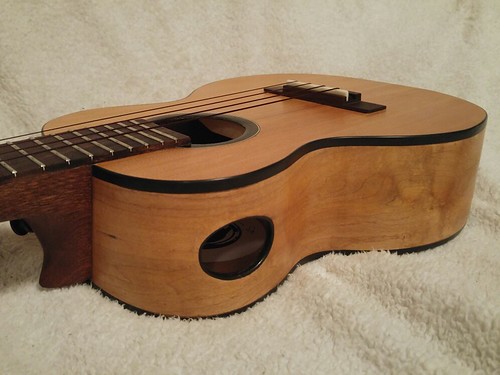
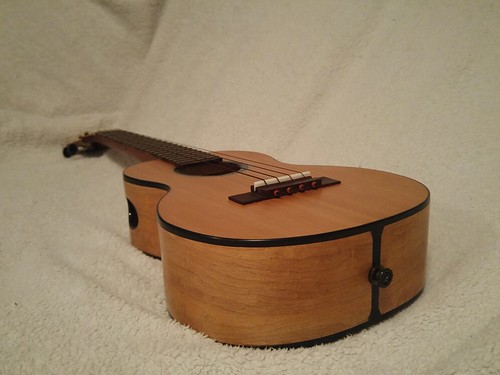
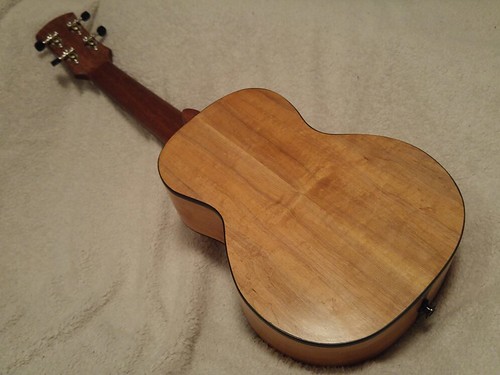
Well, now the top is on, I routed the channels this morning and did the bindings during the afternoon! So good progress again, finally :)!

Oh, and all the good things you fellas say about shellac is totally true.
thumbnail_20170225_191120.jpg
 
It will work out, and all the barnacles will be overlooked. I'm still impressed that you're incorporating a port; and without using templates or routers. I enjoy ported instruments because the sound flows out and is directed to the person playing. It's like having a passive monitor.
 
It will work out, and all the barnacles will be overlooked. I'm still impressed that you're incorporating a port; and without using templates or routers. I enjoy ported instruments because the sound flows out and is directed to the person playing. It's like having a passive monitor.
Thanks Trent! One can start to get a feel for how the uke will look. The neck has some more work before it's done but the soundbox is ready for finishing, which will be done when the uke is assembled.
20170226_090603_resized.jpg
Next step, prepare and do the last on the neck, then aligning it with the body. Wont be done until next weekend though, as I leave for Germany in the morning. Got business there with my day job.
 
I like to see neck connection methods, since they are so varied. My plan for the current build is to use one cross-bolt furniture connector vertically, located about 1/2" from the body joint. No tenon, no glue (maybe no more than a light coat of water-soluble white or Elmer's school glue). Just in case it needs taken apart. Mostly a flat face to face, except for contour matching the heel to body.

The hole will be covered up by the fretboard.

Now how about your trade secret neck joint? ;)
 
Last edited:
I like to see neck connection methods, since they are so varied. My plan for the current build is to use one cross-bolt furniture connector vertically, located about 1/2" from the body joint. No tenon, no glue (maybe no more than a light coat of water-soluble white or Elmer's school glue). Just in case it needs taken apart. Mostly a flat face to face, except for contour matching the heel to body.

The hole will be covered up by the fretboard.

Now how about your trade secret neck joint? ;)
Sure, but I'm using the same method as you're describing. The furniture connector is a bit further down though, about 30mm. I used the same method last time with good results, but rather than just a little glue I used a normal amount of titebond. Might go with just white glue as you´re suggesting this time around.
The horizontal hole is yet to be drilled, but you get the idea:
20170226_190734_resized.jpg
Here's the neck from my last build for reference.
20160916_211539.jpg
I'm using a much slimmer heel on this one, and also slightly thinner headstock (11mm on my current build, 12.5ish mm on my last). Here's this pic again for comparison.
20170226_090603_resized.jpg
 
Last edited:
Good progress, I finished shaping the neck today and set the neck angle. After that I glued the fretboard to the neck and finally, the whole thing to the soundbox. Screw joint and some whiteglue mixed with 'hog dust to fill in any potential gaps. Still got some cleaning up to do around the joint, there's glue squeeze out, but that's easier to get rid of when it's hardened some more.

thumbnail_20170305_164932_resized.jpg
thumbnail_20170305_164947_resized.jpg
 
Nice work! I missed your glue-up method for closing the box. How did you do yours? (Clamps, spools, Jig).

--------------
Edit: I checked back on your earlier build, and saw you used the SM method from their PDF -- rubber bands.
 
Last edited:
(Sequoia said), I say go for the abalone(?) and ditch the wooden rosette, but whatever catches your fancy and aligns with your design idea. I like flash. However, I really do like position markers on the fretboard. When I play I do like to know where the four and five positions are to say nothing of the seventh and octave positions. Missing these positions in the heat of action can be... ugly. I find instruments without these reference points annoying to play. Playable for sure but annoying. Much discussion on this subject and I do understand those that think they are superfluous and unnecessary adornment. But I believe they serve a real purpose for the player. Especially in the dark on stage. Or even in the dark in the living room.
Not to mention the bling, beauty,aesthetic appeal, just plain eye draw that nice abalone rosettes and position markers add to a Ukulele. It makes it a piece of jewelry.
 
Last edited:
Screw joint and some whiteglue mixed with 'hog dust to fill in any potential gaps. Still got some cleaning up to do around the joint, there's glue squeeze out, but that's easier to get rid of when it's hardened some more.

Being an amateur myself I hear your pain. I still struggle with this join. It is a pretty complex joint if it is radioused. I can spend hours getting that thing right. One thing I have learned is that glue squeeze out is not easy to clean up on this joint. And if you try to clean it out early you can get the dreaded "glue wash" around the joint which will show when you apply finish. Ideally your joint should be so good and tight you can avoid putting glue along the edge and leave the edges slightly dry. Or use Pete's method and let things set a bit before joining. When I first look at any instrument now my eye goes right to the neck/body joint and I check out how good it is. Anyway, your uke looks great. Looking forward to seeing the final product.
 
Nice work! I missed your glue-up method for closing the box. How did you do yours? (Clamps, spools, Jig).

--------------
Edit: I checked back on your earlier build, and saw you used the SM method from their PDF -- rubber bands.
This time I used alot of clamps instead, about 8 of them around the box. But the rubberband method works great too.
 
Getting ready to start finishing soon. I'll be leveling the frets today and will likely get the first soak coat on today. It might be that a soak coat isn't necessary due to the layer of shellac though, but we'll see.
 
No good news Im afraid. I managed to completely obliterate a top today, all work goes down into the bin. Messed up when trying to fix a mistake with the rosette, and got black color bleed out from the rosette, into the surrounding area.

Well. At least I got some braces done that I hadn't glued on yet...

When this happens, is it ever possible to turn the pieces over and use the other side s the front of the top?
 
When this happens, is it ever possible to turn the pieces over and use the other side s the front of the top?
Maybe, but not in this case. I had handplaned the thickness on that top.

When doing the final cleaning up on the top before finishing, I messed up the rosette again. Luckily I was able to do a fix, but the looks are quite different. More like David's rosettes at Ono, though not as clean. Still, it turned out acceptable and the wood is looking great with the tru oil on.
 
It's done!

Finally, it's done :D!

The philosophy of this uke has been, keep it simple but elegant and focus on playability. It's early and the strings are settling in, but soundwise I think I succeeded. Fretboard width, neck shape etc to my personal taste.

Specs:
Western Red Cedar top
Bird's eye maple sides and back (low figure)
Sapele neck
Rosewood bridge and fretboard
Satin finish
Groover tuners
Worth brown low G strings
Strap buttons on lower bout and heel.

33058145100_c2f9f47dd2.jpg


33058145620_55c7d95cd5.jpg


33058145370_cbe1e9e781.jpg
 
That definitely looks like a uke to be proud of and if it plays how you like it then mission accomplished.... But... This is finished so you now have to decide what to build next ;)
 
Very nice looking uke. I really like the peghead shape and the fret work looks beautiful. You really took some time here and it shows. I know because fret work can be BORING. But oh so important. The question is: Are you happy with it and what would you do different next time? And you know... how does it....sound?
 
Top Bottom