Aloha Back after a long time.

nic579

Well-known member
Joined
Jul 26, 2009
Messages
138
Reaction score
0
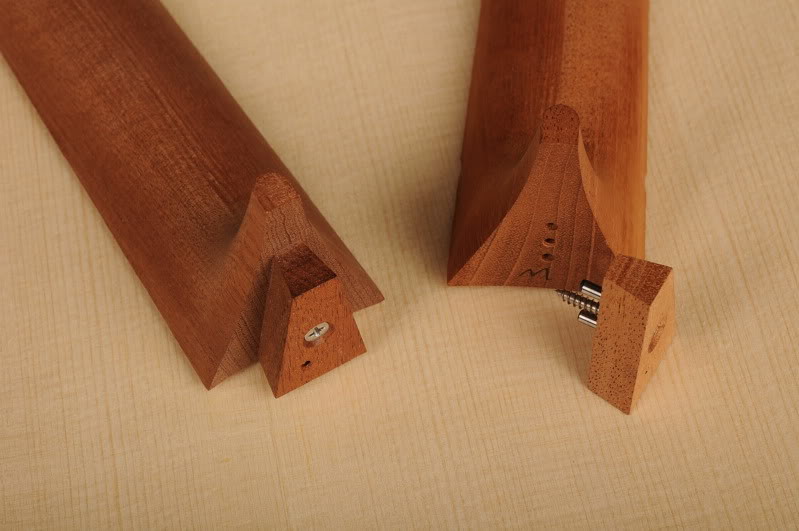
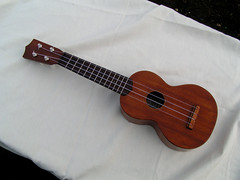
I had built myself a soprano Uke some time back and posted here. i now am working on plans for a Baritone Uke. I am a professional woodworker and have done everything from custom home building to fine furniture work and more. So far I started to draw out the bits in cad + working on filed to CNC rough the neck. I will be slow but will try to update as things progress. Neck modeling is not complete but is roughed out, still need to add the dovetail tenon.

ContactSheet-001.jpg

roughout.jpg
 
Last edited:
Close to finished on neck/dovetail block model.

Tenor_Neck.jpg
 
Last edited:
Close to finished on neck/dovetail block model.

View attachment 104303

Welcome back ....To machine a compound dovetail on the neck is very dificult with a CNC machine even if you have a 4 axis machine...Thats why Martin opted for the "applied dovetail " instead.
Martin's Applied Dovetail
applied by Ken Timms, on Flickr
 
Last edited:
That seems silly, might as well just screw the neck on.
 
What's this Martinesk piece? Soprano?


Followed your link Nice!


37331536410_83ba33e563_m_d.jpg


I like it but after 5 years of furniture restorations I have to admit I like the Dark Red Mahogany stain on mahogany.
 
Last edited:
You know, that was my first thought too. By making it two pieces haven't you lost the whole idea of a dovetail joint?

I think Martins Hand cut Dovetails were their big selling gimmick (the challenge of doing a neat joint like theirs is what started me off making Ukes) ...When they went over to CNC mass production and found the difficulty of producing a CNC cut tenon they had a re-think.... So they came up with this dodgy end grain joint, and called it an applied dovetail, and because it was unseen on the finished job..they hoped no one would notice the word "applied" ..Thats what I think ..could be wrong tho ;)
 
"dodgy" LoL but too true! There is something being lost in automation and non practical knowledge of craft practices in the computer design hands off generation.

I think they only apply the dovetail at all as they need a dovetail for production reasons as at that step they can just slide the joint together and let it roll down the line rather than clamping a tenon joint and screwing through the body on a small uke could be difficult itself.
 
Ya know I have been thinking and looking at this joint. One of my first thoughts is that Martin builds fine instruments and they are way more luthiers than I ever was or will be, so what's up with that? I think it has two advantages: One, it would be quicker to adjust the neck set on a production line than adjusting a traditional dovetail joint which takes time. Time is money. Great video on YouTube by the way on the person in the Martin factory who does all the neck sets. She works fast, but it still takes her 3 to 5 minutes per guitar. She turns out about 20 an hour. With this system a neck set could be done in seconds with the twist of a screw.

Two: If the guitar came back to the factory for a neck re-set (which it might with that weak system), it would be a no brainer. A mere adjustment of a screw versus the nightmare of... you know. Time is money.

But in the end it sacrifices all the advantages of a straight dovetail joint and just substitutes what is really just a wedge on a straight butt joint... At this point it would be nice if a Martin rep would chime in with some info.

(Ha ha ha ha ha! Ha!)
 
Last edited:
Played a bit more today and have to admit that actually getting shaping you want out of the software is much more difficult than it should be.

First Save v43PartNoTenon.jpg
 
Decided to continue with the tenon will probably hand cut as I did not have any issue doing the soprano as I have many years hand cutting visible joinery. Things go quick with good Japanese Razor saws and proper chisels.

Still learning the new software will probably build the whole Tenor Uke in here just for experience.

First Save v10 v1.jpg

First Save v10 v1-2.jpg

First Save v10 v1-3.jpg
 
Last edited:
I thought it looked beefy but was following some old drawings I have floating around.
 
Top Bottom