Stew-Mac Tenor Progress

zdiver7

Well-known member
Joined
Jul 15, 2009
Messages
140
Reaction score
0
Location
San Diego, CA
Hey everyone!

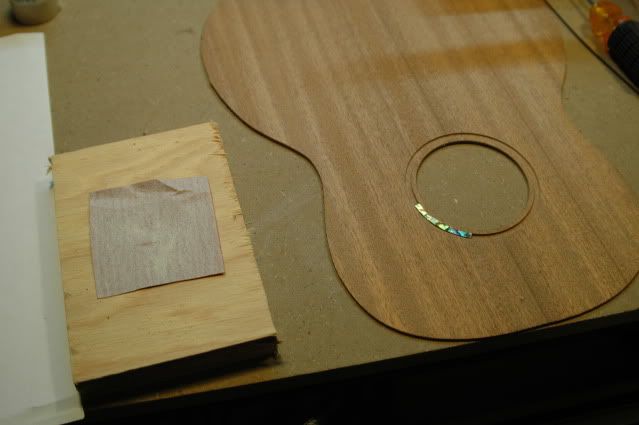
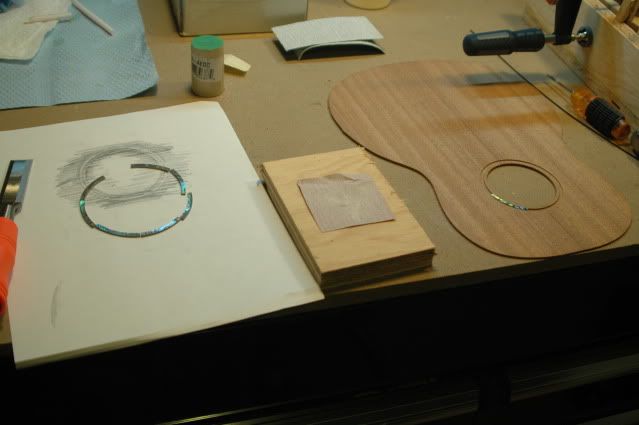
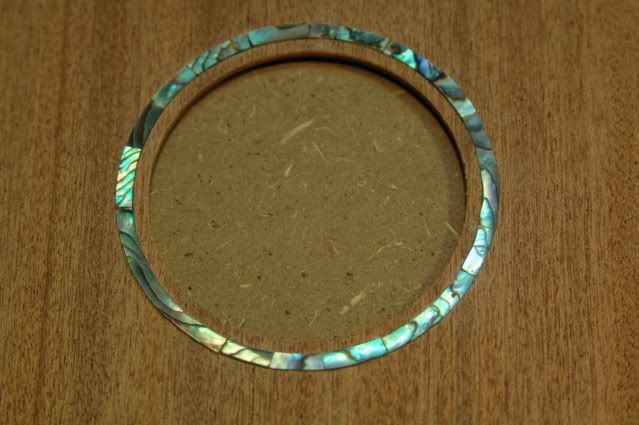
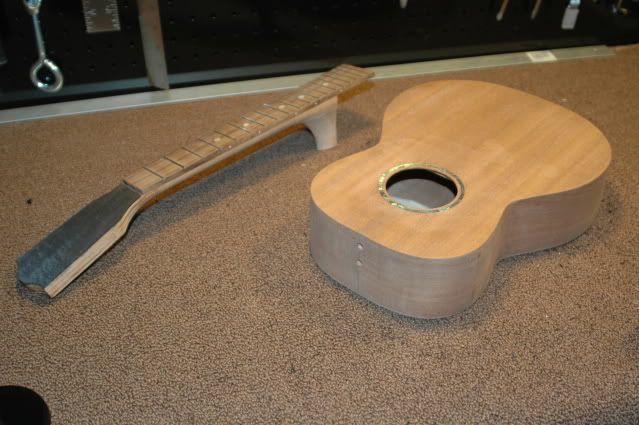
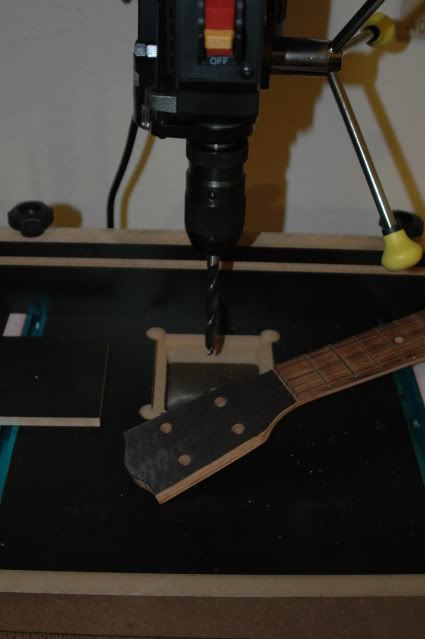
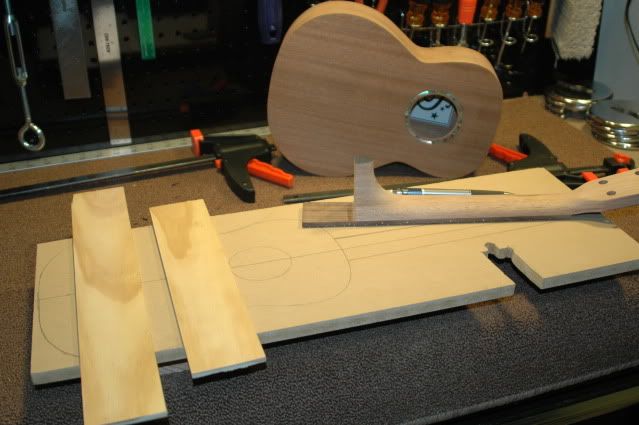
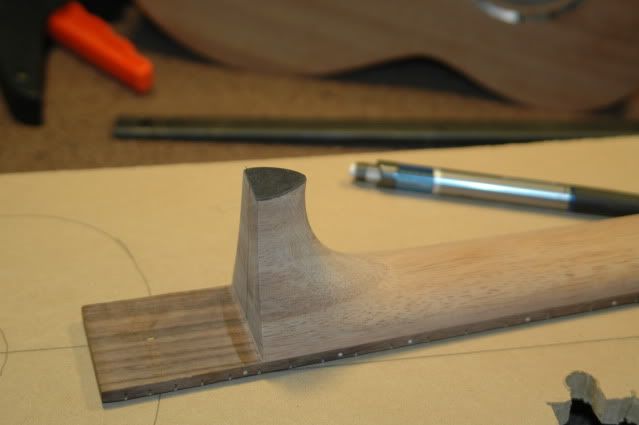
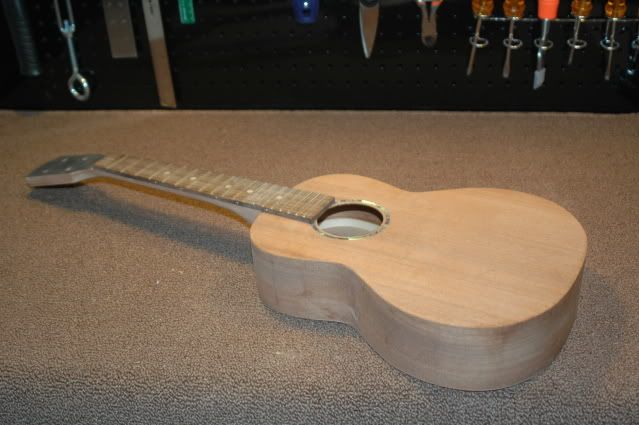
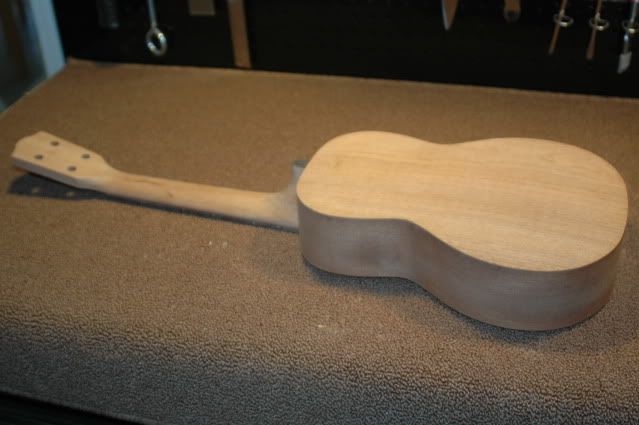
Since it seems that there are a few of us building the Stew-Mac Tenors right now, I thought I would share some pics of my progress...

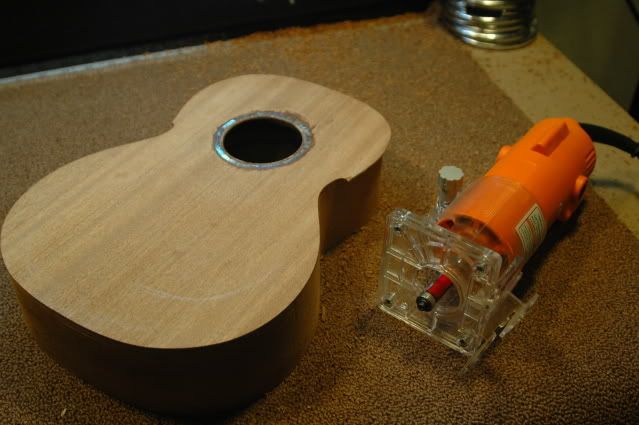
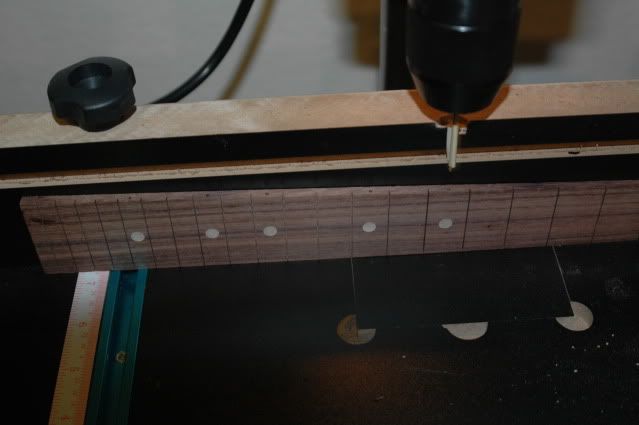
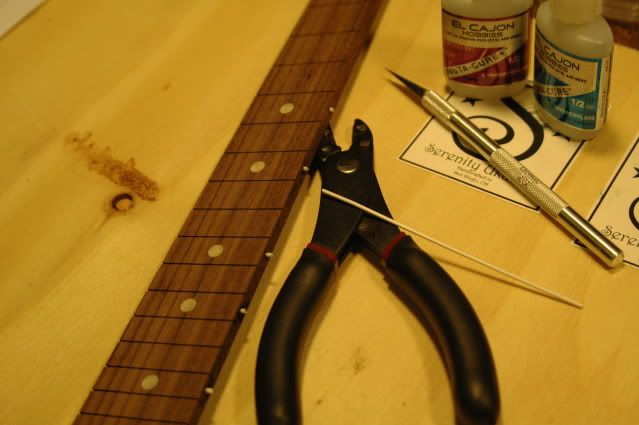
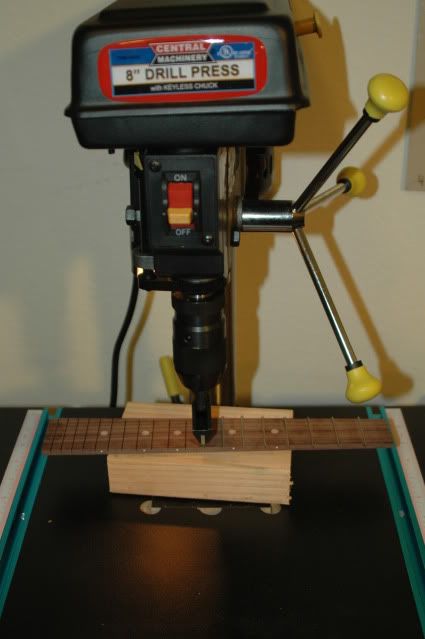
Currently, I am in the process of final sanding and prep for finishing. I need to order my finish still...I am going to go with a Zpoxy grain fill and KTM-9 waterbased finish. I may still go with nitro, but right now I am thinking that I will order the H20based :)

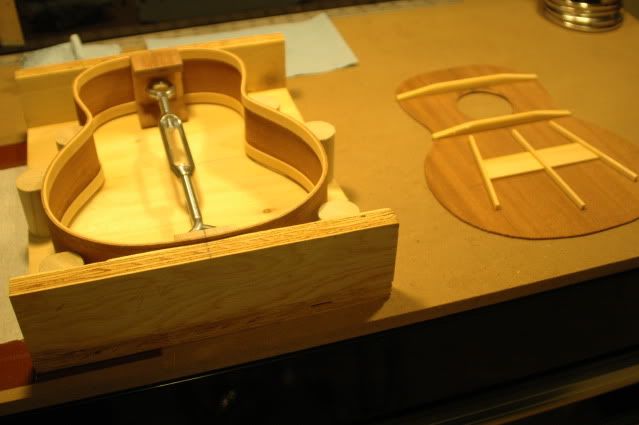
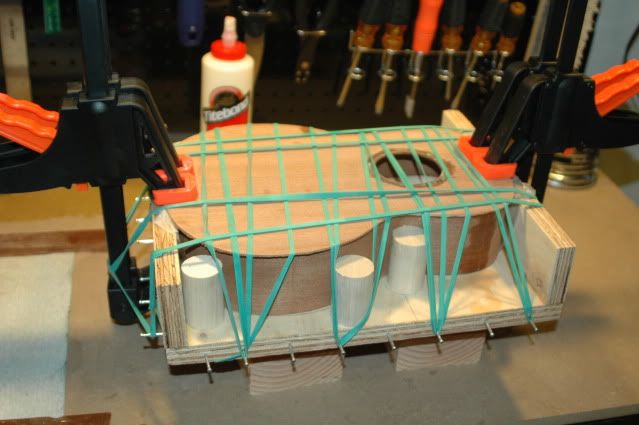
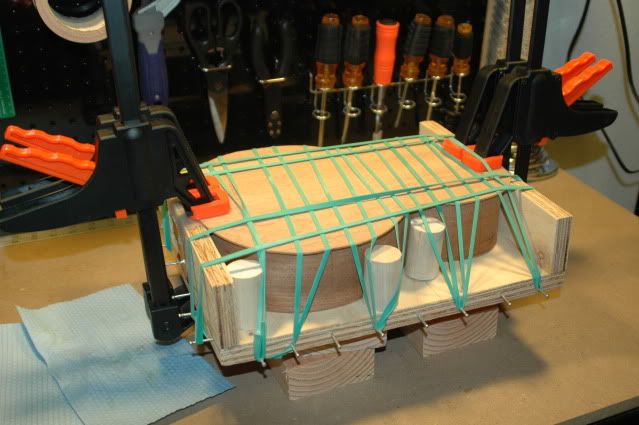
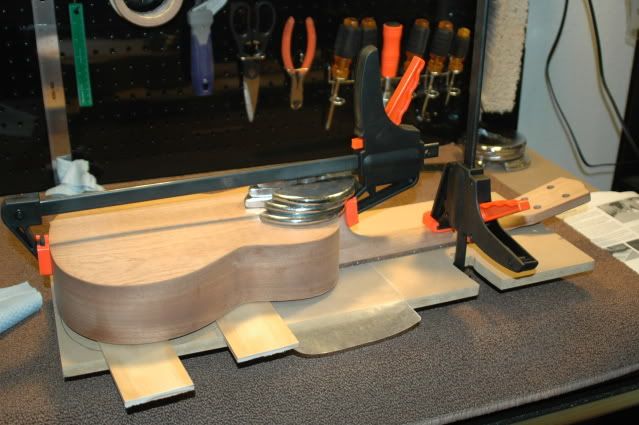
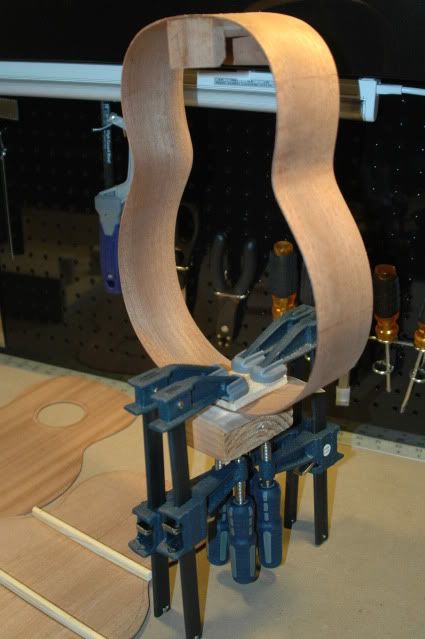
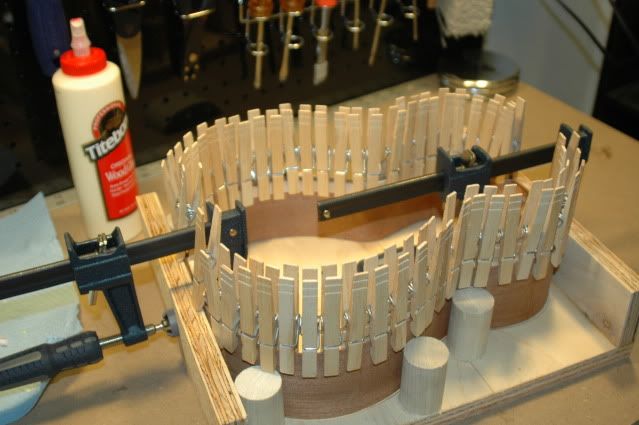
A few of you were asking about the Stew-Mac building jig...you can see in some of the pics what I did to mine, I think it helped keep the sides and body still during the process, and was very quick and easy to build.

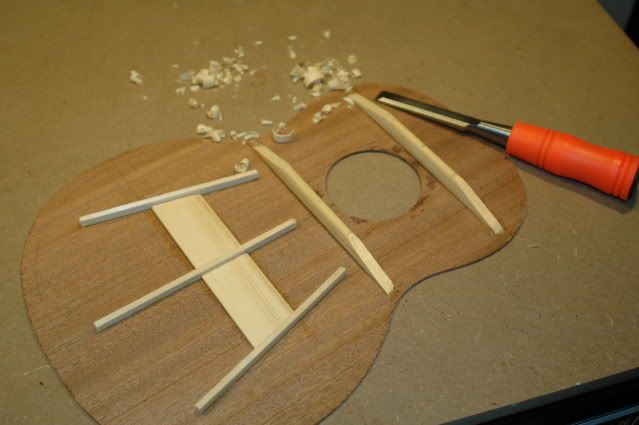
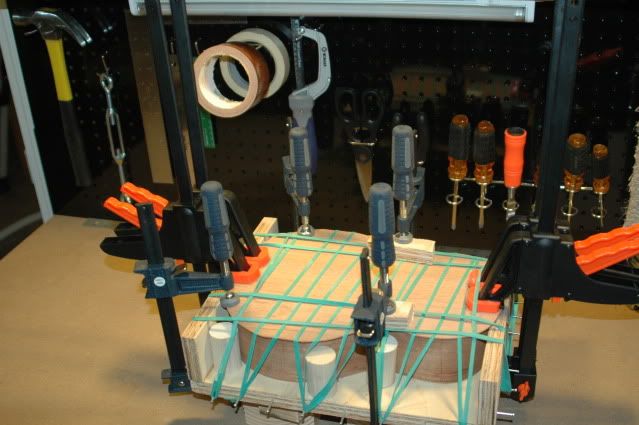
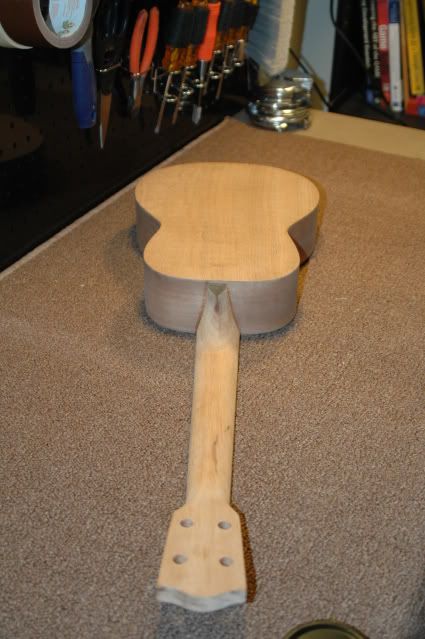
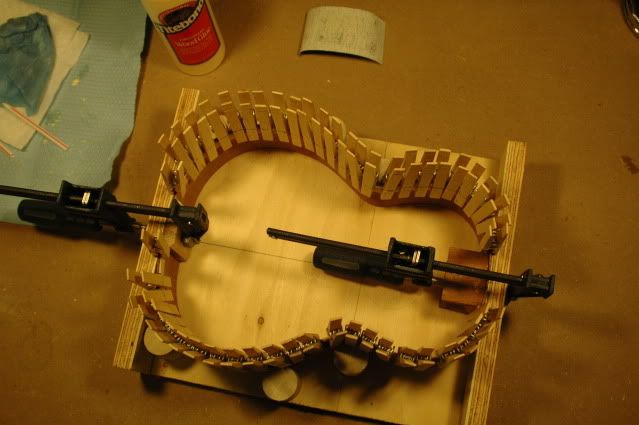
Sooo... first are some pics of the neck and tail blocks, along with the linings getting glued in. For those who were asking about the building jig, note that instead of the L-brackets, I used 1" dowels cut to necessary length and placed them at the waist, above and below the lower bout...no problems with a wiggly body or sides!

DSC_0145.jpg


DSC_0147.jpg


DSC_0151.jpg
 
Next I decided to do a Paua Abalone rosette. I ordered the 1/8" pre-curved rosette from luthiersupply.com. I knew that some breaking and re-fitting of the rosette would be necessary since the diameters would be different, but I was in for a bit more than expected. The rosette was a bit larger than 1/8" so not only did it need to be curved more to fit the channel, it would also have to be sanded down a bit to fit. I just used sandpaper, a resperator, and some patience to break each peice of shell and sand each peice down as necessary till it fit right. Took a few hours, but with some good music playing in the backgroud, I had a very enjoyable experience doing this.

Once everything fit right, I used thin CA glue, flooded the rosette and let dry. I followed this up with medium CA to fill the gaps and be sure everything was set well (thanks to everyone who responded to my posts about gluing in inlays a while back, especially Chuck Moore). I let this dry overnight and the next day went to work to level the rosette (at this point, with all the glue covering it, it looked like crap and I thought I had ruined it!). I carefully used my random orbit and 120/220 grit papers to get the rosette level to the soundboard, once it was complete, it was beautiful again, also nice and flush, all gaps filled, etc... too bad I didnt take any pics of the whole process though!

DSC_0152.jpg


DSC_0156.jpg


DSC_0163.jpg
 
now came time to box it up. After sanding the sides flush for the top, getting the bracings, tonebars and bridge patch glued up, chiseling the bracings, and doing a few dry fits, it came time to glue on the top and back. The rubberband method worked great for me, the top went on with no problems, no gaps or any sliding of the soundboard while I was getting the bands strung up.

Afterwards, I ended up getting the small trim router for 20 bucks at Harbor Freight, and using a flush trim bit got the soundboard almost perfectly flush and clean with the sides.

Repeat process with back...this time the part near the waist had a tiny gap(i think...maybe it was just my eyes and shadows) but just to be sure I used more clamps with small peice of wood to help keep this part pressed down during the glue-up...

DSC_0164.jpg


DSC_0167.jpg


DSC_0168.jpg


DSC_0169.jpg
 
Next came fingerboard and frets... fun process, ended up using the Stew-Mac caul insert for my drill press...pretty easy, but I would have just done it with a fret hammer now that I know what the process is :)

Leveling the frets was my only fubar so far...somehow I used too much pressure on one side of the fingerboard or something and flattened out one side of the first 3 frets!! What the heck?! So now I thinkI will pull those 3 and replace them, them relevel, recrown, etc...

DSC_0184.jpg


DSC_0186.jpg


DSC_0192.jpg
 
I also decided to put on an ebony headstock veneer, so used a bit of the extra for the heel decoration as well...

DSC_0200.jpg


DSC_0201.jpg


DSC_0203.jpg
 
Next came the time to connect the body and neck. Drilled in the body using a brad point drill bit, and found the proper hole locations with dowel pins. Cut dowels down to size, used the assembly jig/platform and got everything mated up nicely..

Now, the on PITA parts about this was getting the neck and body to match nicely and not have any gaps, considering the radius in the body! Now I can definitely see why some of you build ukes with FLAT neck and tail areas! :) I just did the best I could at getting the areas flat and matched, then used a mixture of titebond and mahogany dust to fill the small gaps, now it looks great!

DSC_0204.jpg


DSC_0205.jpg


DSC_0206.jpg
 
So now here is the uke as it sits on my workbench currently...

getting ready for final sanding and surface prep, and still thinking about what finish to use! :) Hopefully I can buy everything I need this weekend and start the finishing process, but it's going to be a busy weekend at work so I'm not sure I will have time to work on the uke anytime in the next few days....

hope you enjoyed the pics, especially the people who are, or are getting ready to build the kit as well!

DSC_0208.jpg


DSC_0210.jpg


DSC_0211.jpg
 
Nice work

Really nice result. Good work. Glad to see that I'm not alone in some getting tools from Habor Freight. :D
I'm getting ready to start a soprano kit.

You certainly are well organized in your work area. That certainly helps.

What did you decide to do for a finish? When I get to that point, I'm going to use tru-oil, as it seems pretty easy. Although I am half tempted to use Formby's for a gloss finish.

Thanks for the progress pics.
 
I ordered the 1/8" pre-curved rosette from luthiersupply.com. I knew that some breaking and re-fitting of the rosette would be necessary since the diameters would be different, but I was in for a bit more than expected.

Hana Lima has a pre-curved paua rosette that is almost exactly the right diameter for this application. That's what I ordered. Unfortunatley, the color of the paua isn't as nice as the material supplied by luthiersupply.com

Nice job on the build, BTW! I'm just getting started on mine...

Mika
 
Great job documenting the process zdiver and good progress on the uke.
Your shop on the other hand is just a little too neat and tidy. Your suppose to let that sawdust settle and accumulate some.:D
 
Wow, the build looks like it's going great! :)

What is the paper with the S and stars that you put on the inside of the uke? I can see part of it on one of the pictures on your workbench, and can kinda see it on the inside of the uke...just curious, cant make out the whole word or the tiny lettering underneath it :)

Bravo on your progress so far! :)
 
This is so cool. I had no idea about the process of building a uke but all your hard work paid off because I saw the finished product and it looks amazing!
 
Top Bottom