joejeweler
Well-known member
- Joined
- Jul 7, 2011
- Messages
- 538
- Reaction score
- 0
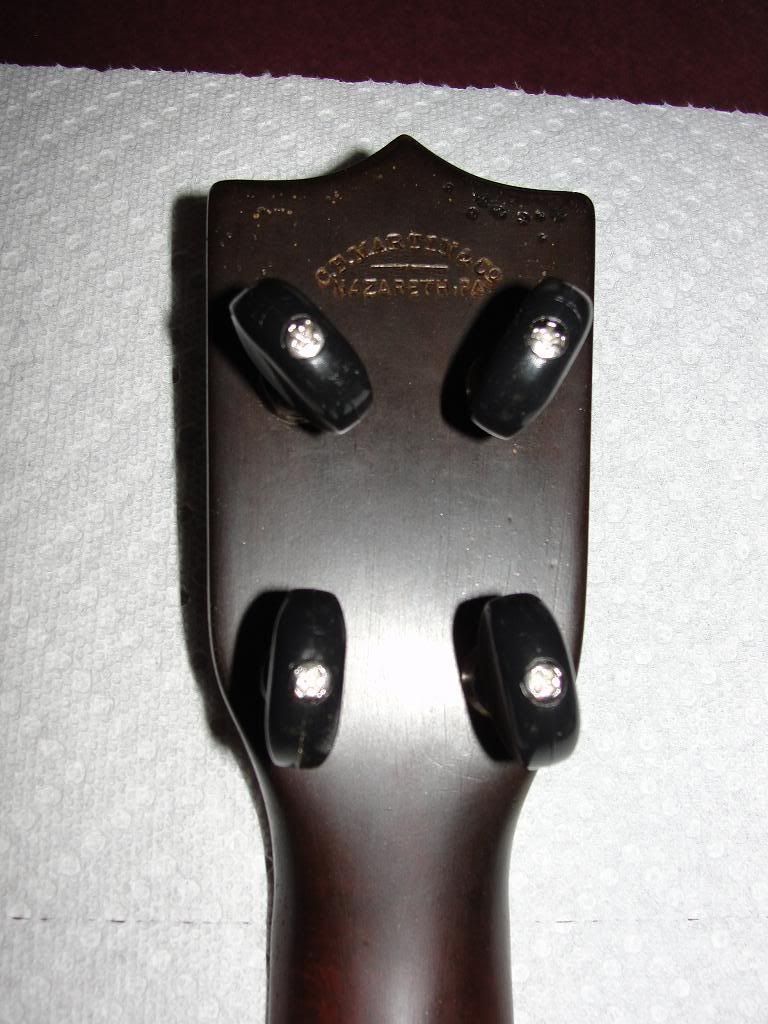
A few weeks ago i picked up a 1920's era Martin Style 2 Soprano uke on Elderly for $850.00 It has had NO cracks in all those years, and is loud and sounds mighty fine. Light as a feather....
It was refinished with a pretty dark stain over the mahogany, probably decades ago from the looks of it. (the rosette was so dark it was hard to see). The peghead had a replacement set of wooden violin style friction pegs when i got it,......ughhh,...what a PITA to use.
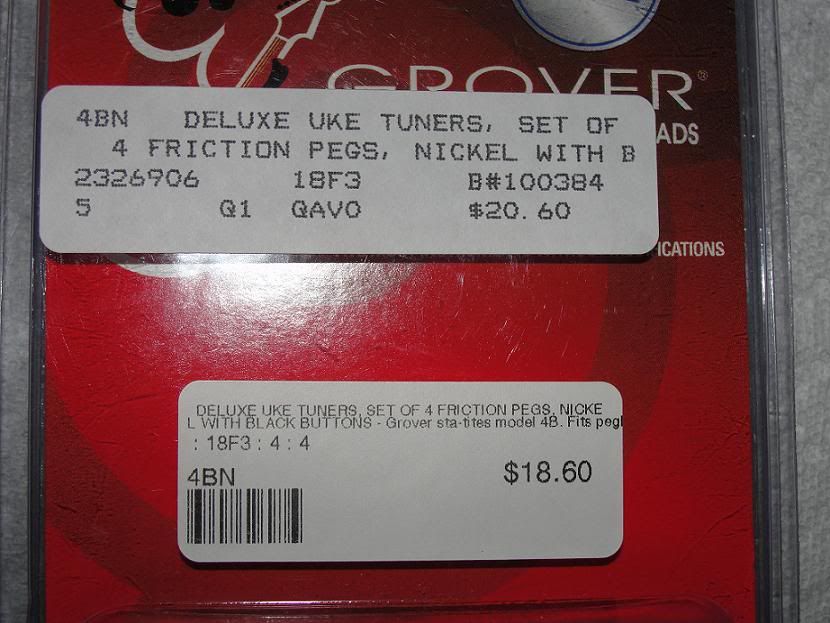
I decided right off i was NOT going to alter the tapered peg holes to install a set of resonably priced Grover "Sta-Tite" friction tuners i had ordered, and they arrived this morning. (only $20.00)
"Peghed" geared tuners were an option, but they're $80.00 , and I don't particularly like the extra length of them either,.....especially on a soprano scale uke.
The early Martin had survived over 90 years without a crack, and i was not going to ream out the fronts of the peghead to install the bushing that comes with the Grover fiction tuners.
I looked them over carefully, and decided there was no reason i couldn't get them installed on the Martin, making only changes to the parts and their arrangement,......and leaving the unaltered tapered peg holes alone.
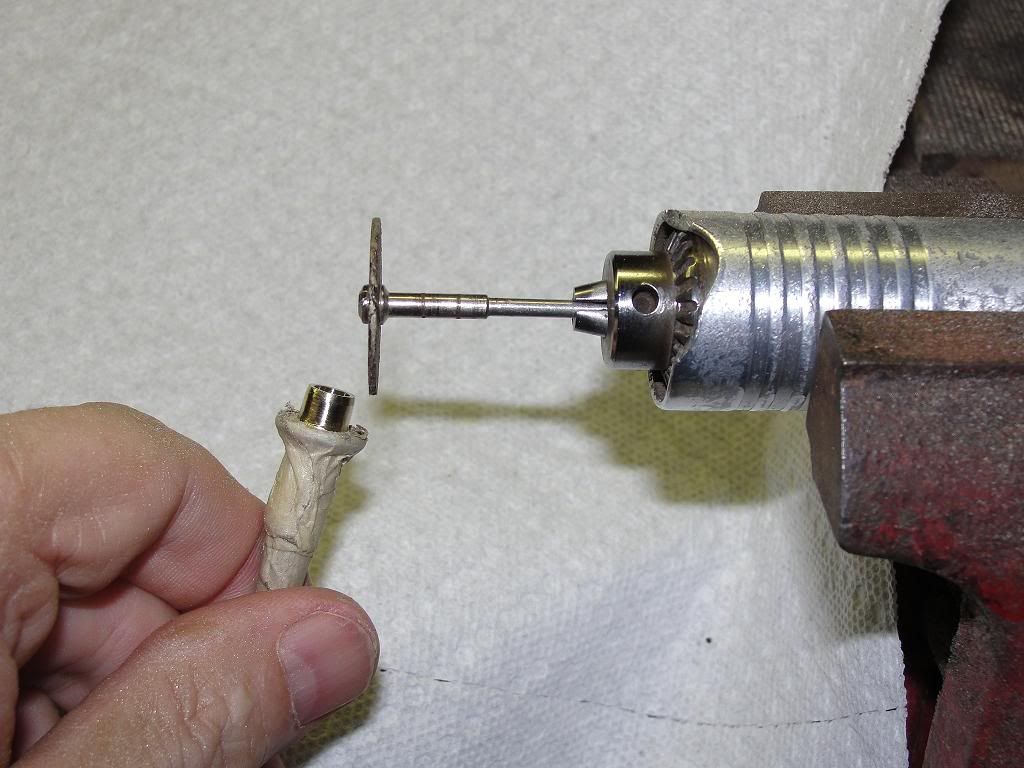
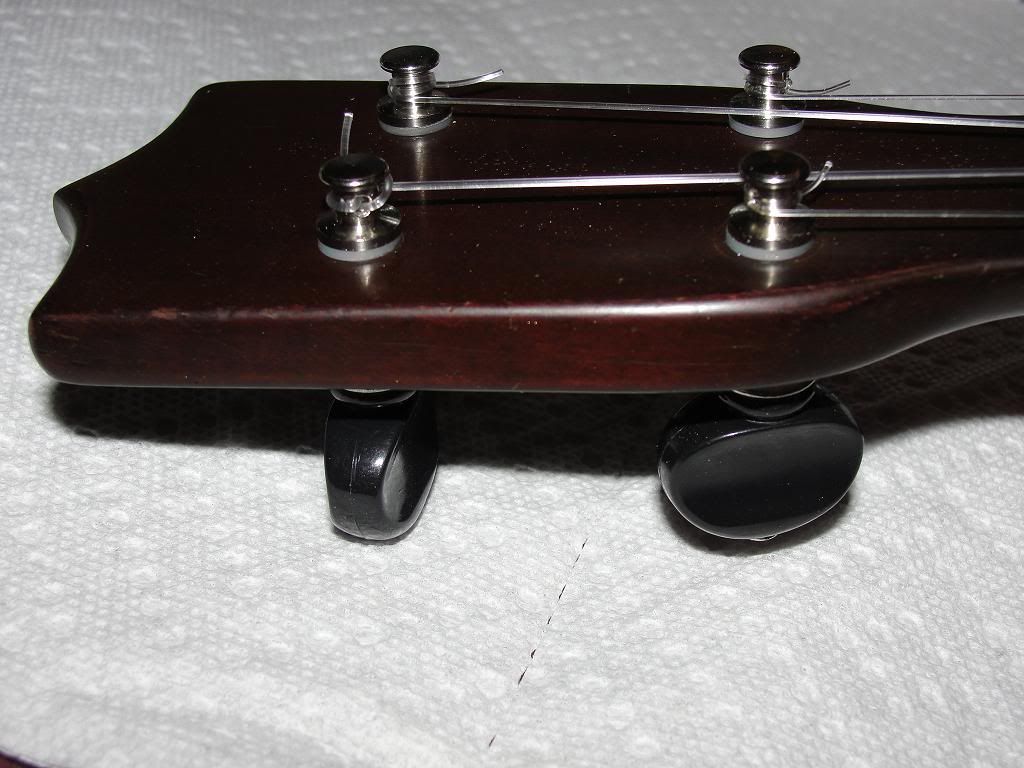
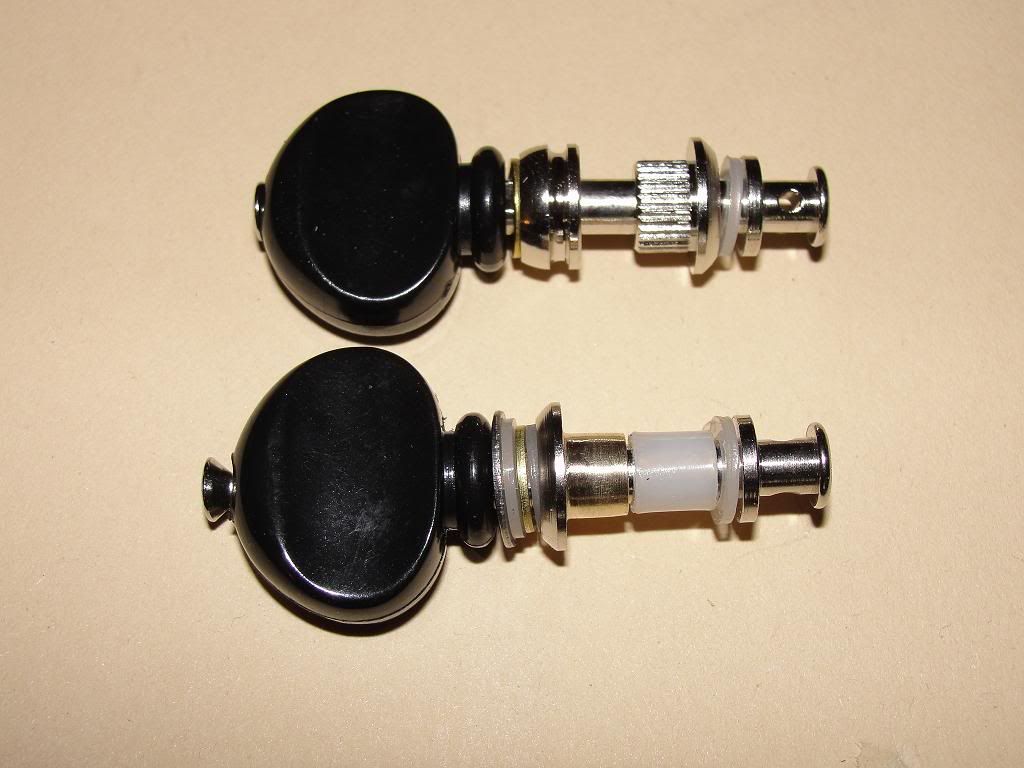
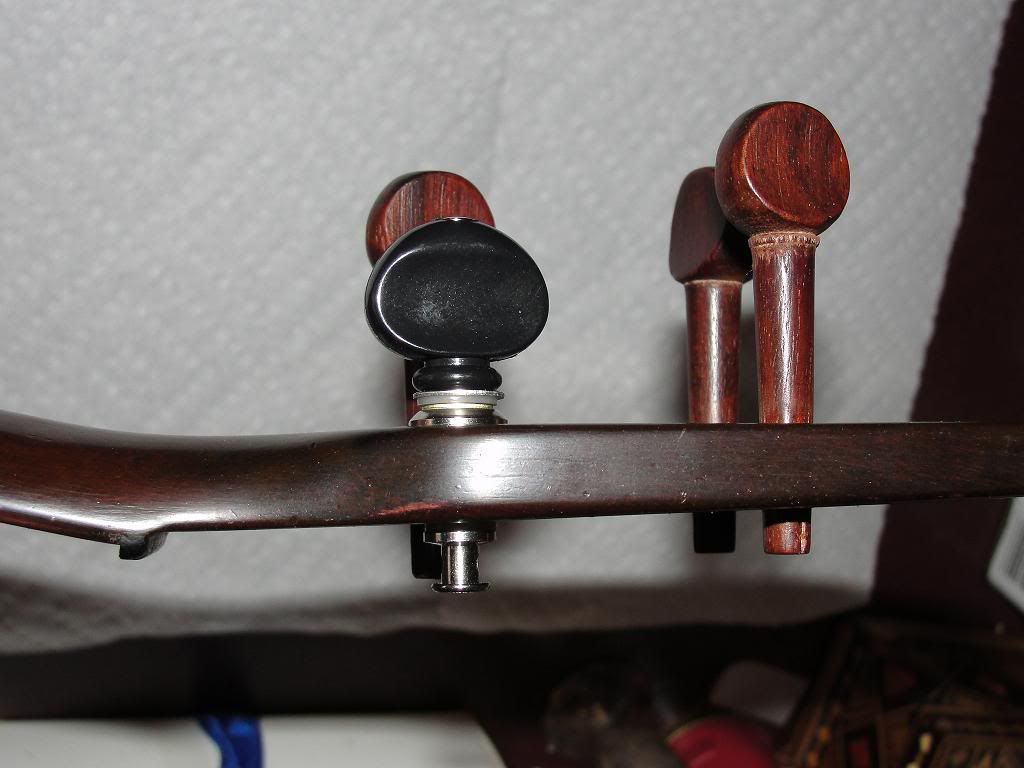
In the 1st pic below, the upper tuner is how it comes form Grover, in the arrangement of parts as you would normally install it. The main stumbling block is the front bushing that is splined to fit a larger hole than the Martin had. The taper of the peg hole was just too narrow at
the front of the peghead to be able to remove enough of this bushing and still have enough left to do it's job.
The lower tuner in the picture is after i have altered and fitted it to be a press fit into the "rear" of the peghead. It's much wider hole there allowing for fitting, yet plenty of metal left to secure and guide the tuner shaft.
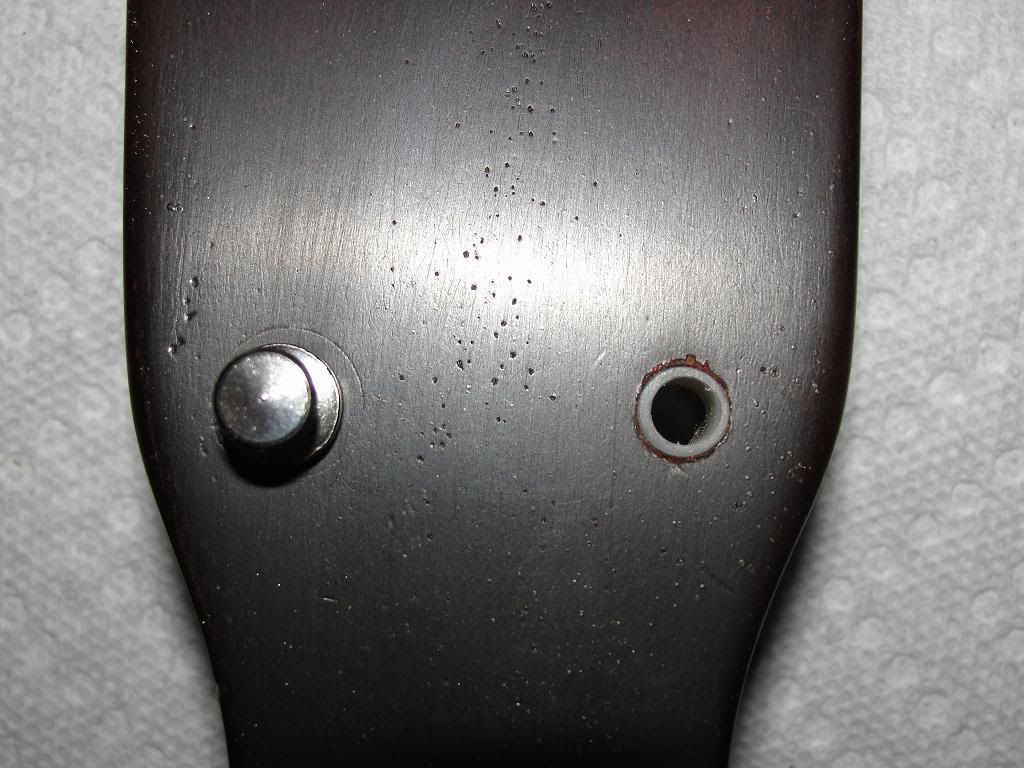
After i got the bushing fitted to the back hole (a press fit with thumb pressure), i saw that there was a little space above the bushing that i wanted to address.
Before i made a trip to the hardware store, i decided to connect everything up just to make sure it was going to work as i hoped. It did, but i wanted to support the front part of the shaft since that's were the string tension is pulling most directly. Off to the hardware store........
I picked up both nylon and aluminum spacers that fit the upper hole section perfectly, although the holes would have to be opened up to accept the shaft. In the end i decided to use the hard nylon as a bushing, as it has a natural lubrication. Try drilling this stuff and your
drill better be sharp! Also on my list were additional nylon and stainless washers to fit the shaft and add some needed spacing.
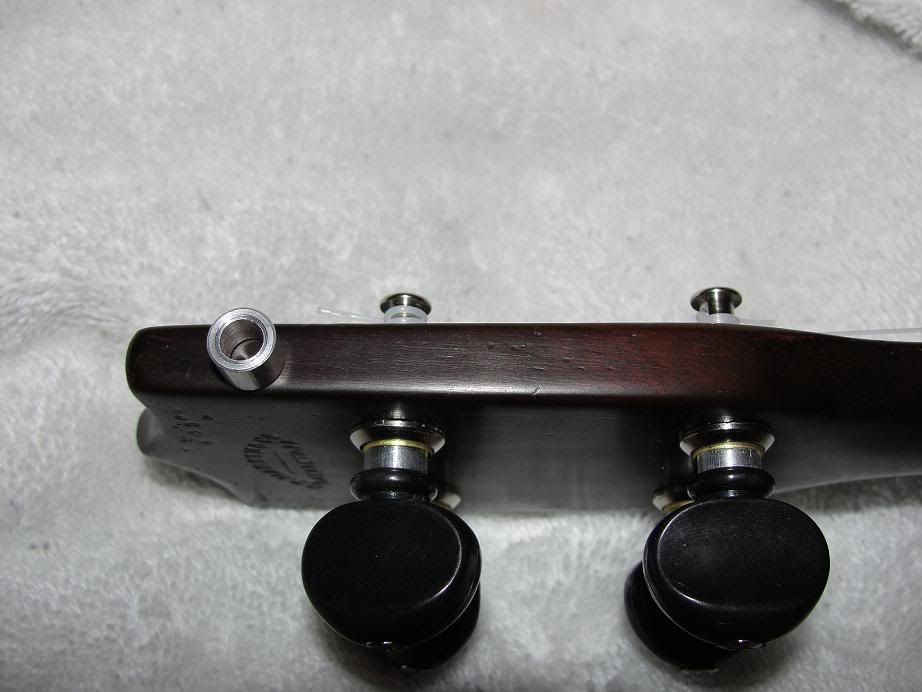
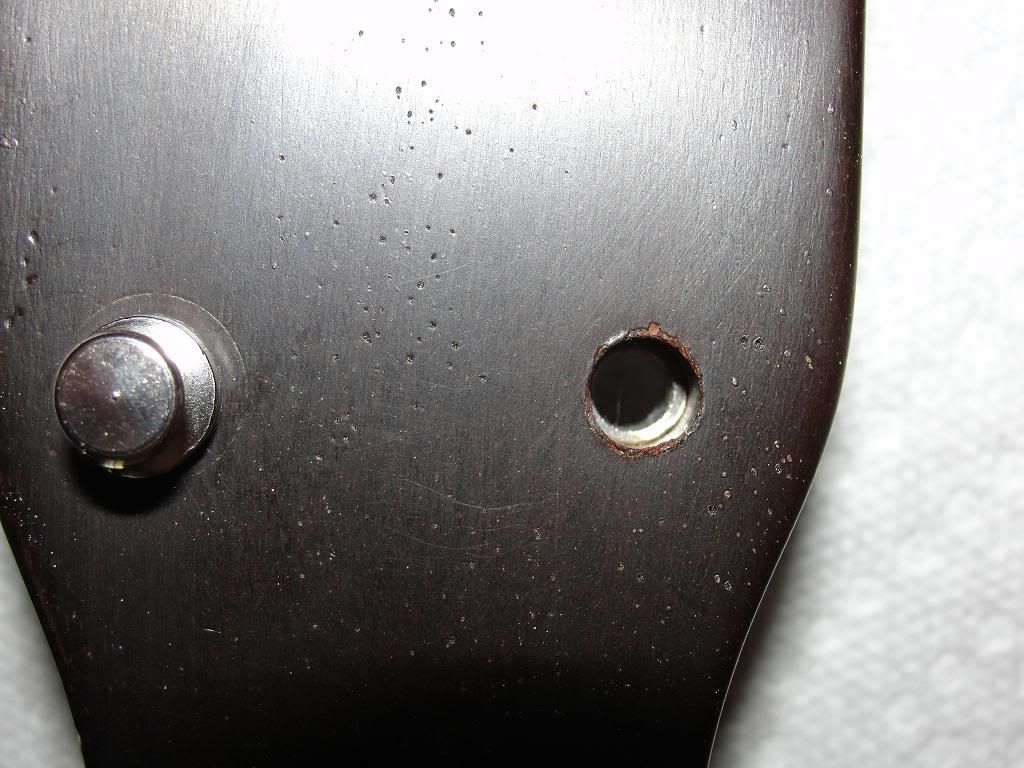
Here's one of the nylon bushings fitted to an upper hole, after the back bushing was in place. I didn't have a drill, so used some diamond setting burs i had on hand. A ring clamp (for jewelry work) held the little bugger while i worked the hole larger. A course rat tail file would have worked also,....just didn't have one of the right size.
I had to trim 2 of these nylon bushings in length also, due to the taper in thickness of the peghead. Only a few millimeters, but i wanted the nylon bushings flush to the top.
Here's the bushing now in place:
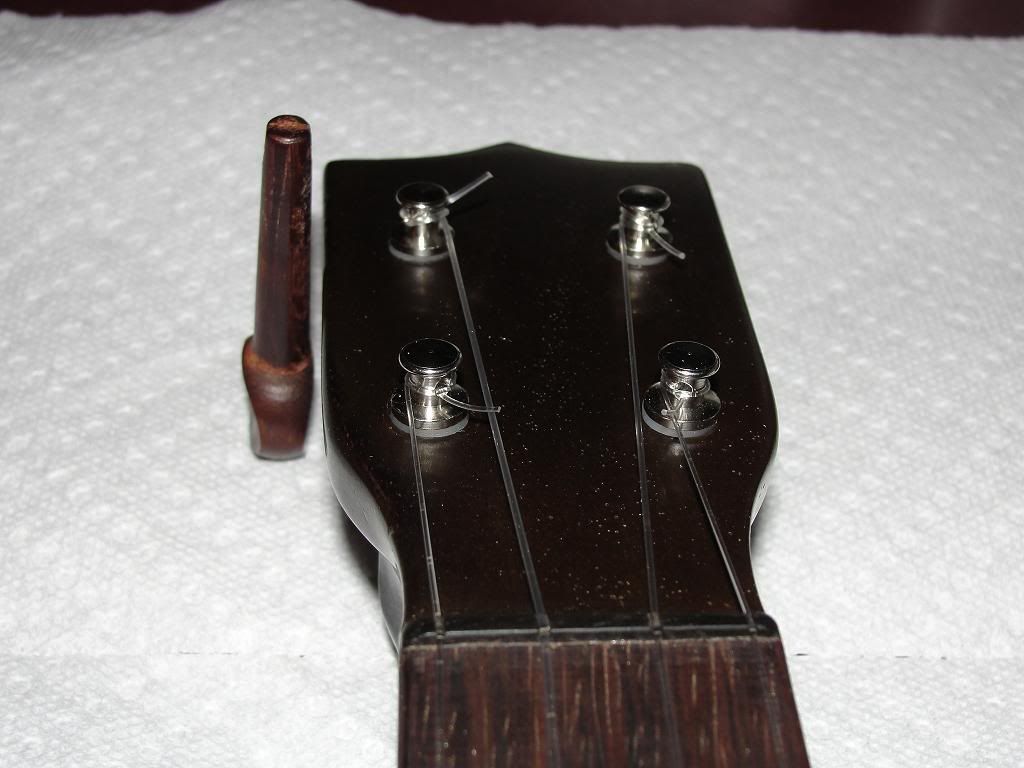
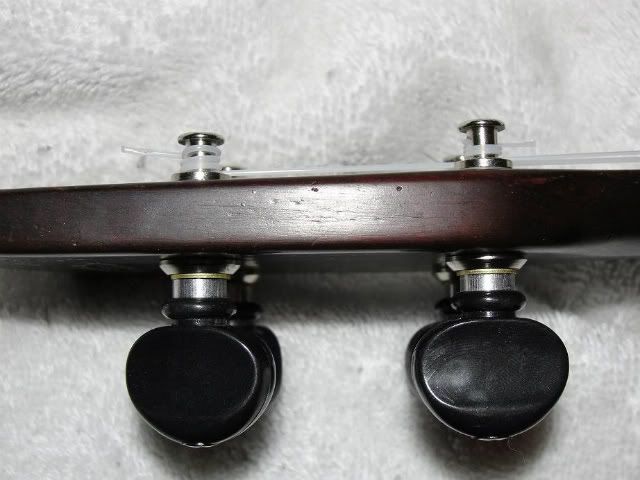
Here's the first tuner fitted and installed. Note the much nicer overall match to the peghead. Those wooden violin pegs are about what the "Peghed" geared tuners would look like,....this is cleaner imo. I can live without the 4 to 1 gear ratio the Peghead geared tuners offer, in order to keep the smaller overal size.
......more to follow......
It was refinished with a pretty dark stain over the mahogany, probably decades ago from the looks of it. (the rosette was so dark it was hard to see). The peghead had a replacement set of wooden violin style friction pegs when i got it,......ughhh,...what a PITA to use.
I decided right off i was NOT going to alter the tapered peg holes to install a set of resonably priced Grover "Sta-Tite" friction tuners i had ordered, and they arrived this morning. (only $20.00)
"Peghed" geared tuners were an option, but they're $80.00 , and I don't particularly like the extra length of them either,.....especially on a soprano scale uke.
The early Martin had survived over 90 years without a crack, and i was not going to ream out the fronts of the peghead to install the bushing that comes with the Grover fiction tuners.
I looked them over carefully, and decided there was no reason i couldn't get them installed on the Martin, making only changes to the parts and their arrangement,......and leaving the unaltered tapered peg holes alone.
In the 1st pic below, the upper tuner is how it comes form Grover, in the arrangement of parts as you would normally install it. The main stumbling block is the front bushing that is splined to fit a larger hole than the Martin had. The taper of the peg hole was just too narrow at
the front of the peghead to be able to remove enough of this bushing and still have enough left to do it's job.
The lower tuner in the picture is after i have altered and fitted it to be a press fit into the "rear" of the peghead. It's much wider hole there allowing for fitting, yet plenty of metal left to secure and guide the tuner shaft.
After i got the bushing fitted to the back hole (a press fit with thumb pressure), i saw that there was a little space above the bushing that i wanted to address.
Before i made a trip to the hardware store, i decided to connect everything up just to make sure it was going to work as i hoped. It did, but i wanted to support the front part of the shaft since that's were the string tension is pulling most directly. Off to the hardware store........
I picked up both nylon and aluminum spacers that fit the upper hole section perfectly, although the holes would have to be opened up to accept the shaft. In the end i decided to use the hard nylon as a bushing, as it has a natural lubrication. Try drilling this stuff and your
drill better be sharp! Also on my list were additional nylon and stainless washers to fit the shaft and add some needed spacing.
Here's one of the nylon bushings fitted to an upper hole, after the back bushing was in place. I didn't have a drill, so used some diamond setting burs i had on hand. A ring clamp (for jewelry work) held the little bugger while i worked the hole larger. A course rat tail file would have worked also,....just didn't have one of the right size.
I had to trim 2 of these nylon bushings in length also, due to the taper in thickness of the peghead. Only a few millimeters, but i wanted the nylon bushings flush to the top.
Here's the bushing now in place:
Here's the first tuner fitted and installed. Note the much nicer overall match to the peghead. Those wooden violin pegs are about what the "Peghed" geared tuners would look like,....this is cleaner imo. I can live without the 4 to 1 gear ratio the Peghead geared tuners offer, in order to keep the smaller overal size.
......more to follow......
Last edited: