Having problems re-stringing my Martin Tenor with bridge pins

Howie1947

Well-known member
Joined
Apr 15, 2008
Messages
755
Reaction score
0
Location
Newport, RI
Can't seem to get the string to secure itself properly. Keeps popping out, and this is only the 4th string. Yikes..............Any suggestions on how I can get the sucker (string) to keep from popping out of the bridge pin hole?????????
 
I've owned several Martin tenors so I can offer some tips. Try this:

1) Double knot the string

2) Turn the pin so that the groove faces away from the headstock.

If that fails, you can string a small bead onto the end of the string. Be sure to hold the bridge pin in until the string is close to pitch, other wise the pin can become a projectile. Hope this helps.

- Steve
 
Maybe getting the beads would be the easiest?? Where do I get the beads? I thought the groove on the bridgein needed to be facing the front of the headstock, so as to position the string better?
 
Maybe getting the beads would be the easiest?? Where do I get the beads? I thought the groove on the bridgein needed to be facing the front of the headstock, so as to position the string better?

I would try the beads last. The strings will seat fine with the bridge pins turned around and it may solve your problem, even without an extra knot. I did this on all of my Martin tenors.

If you do have to get beads, any craft supply store will have some small enough. Here in Florida I've gotten them at Michael's which I believe is in California too.

- Steve
 
Maybe getting the beads would be the easiest?? Where do I get the beads? I thought the groove on the bridgein needed to be facing the front of the headstock, so as to position the string better?

Usually a slot is not required on most of the ukes i've owned with bridgepins.

On my Kanile'a soprano with bridge pins, i replaced the original plastic pins (with a groove) with Stewmac's ebony bridgepins "without" any groove at all. I shorthened them up also to just about 1/8" or so longer than needed to clear the knots, to lessen the weight a bit. A final touch after fitting them to each hole and seriously decreasing their height was to label each pin to make sure they could always find the right matched hole.

They look much neater now,.......and well worth the time. Sounds GREAT! Below is one post from a thread i started when i made some changes to the Kanile'a to better suit my playing and preferences.

The entire thread is located here: http://www.ukuleleunderground.com/f...Preference-Changes&highlight=Kanile's+Soprano

Related thread where i added the fabulous Waverly 17 to 1 ratio geared tuners to it: http://www.ukuleleunderground.com/f...mmended....&highlight=Waverly+tuners+kanile's

Thought i would update the bridge pin change i made. The ones i made originally were never intending on being the final ones, as they have a slot cut into the post that is not necessary, and the ebony was not the best looking.

Today i got in my set of 6 ebony guitar bridge pins from Stew-mac,.....unslotted, and the ebony grade is much better.

http://www.stewmac.com/shop/Hardwar...trap_Buttons/Unslotted_Ebony_Bridge_Pins.html

They originally stuck up about 1/8" too high. I pushed them onto the open jaws of my Foredom flexable shaft handpiece while it was in my workbench mounted vise. Carefully pushed on while spinning, it self centers and spins true. Then a small file was used while the pin spins and i could turn down the shaft to get close. (easy to pull the pin out of the handpiece and check the fit often) When it was close i used 320 grit sandpaper, and when really close finished up the shaft with 600 grit paper. The ball ends were similiarly finished off with 600 grit paper, but additionally brought to a high polish with a jewelers polishing compound and small wheel.

All the main work was done while the new pins were full length, as the handpiece jaws leaves small grooves in the ends. Those sections are cut off in the end anyway, but it's much easier to work on the pins this way.

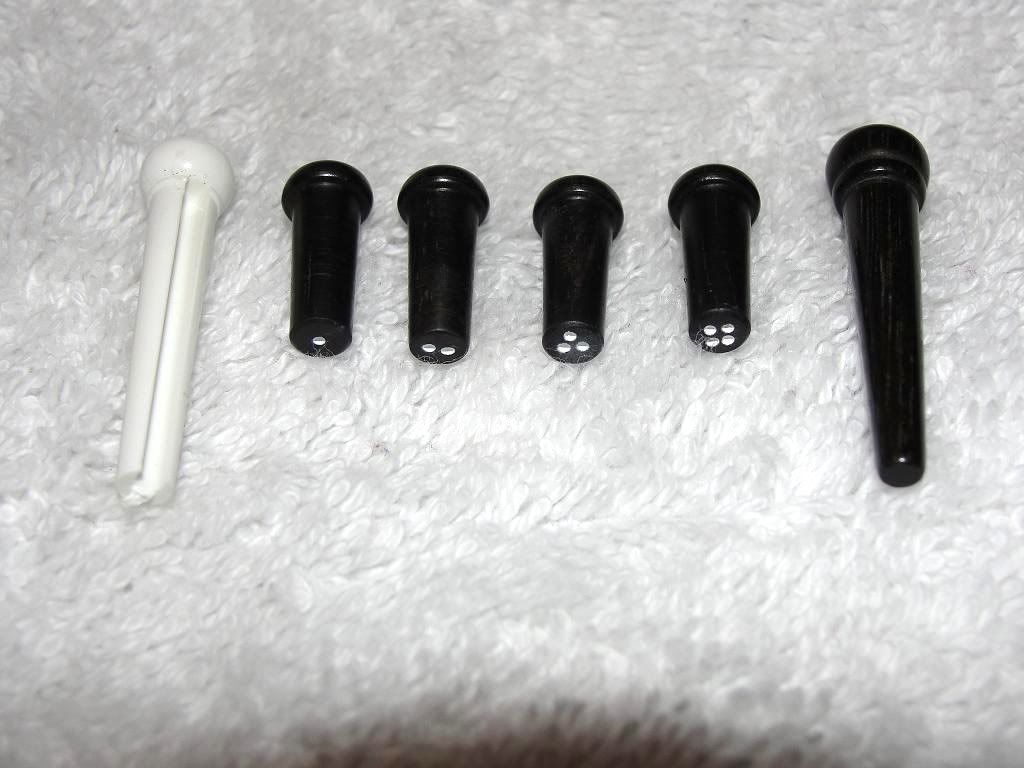
I decided to make them with a little more rounded defination to the top, and fitted them really close to each individual hole. To keep them straight, i came up with a simple way to number them that is easy to see and looks pretty cool. I had some small round ball burs that i cut into the tails of the pins, and painted white into the holes for easy visability. When changing strings it will be easy to get them into the right holes.

DSC03657.jpg


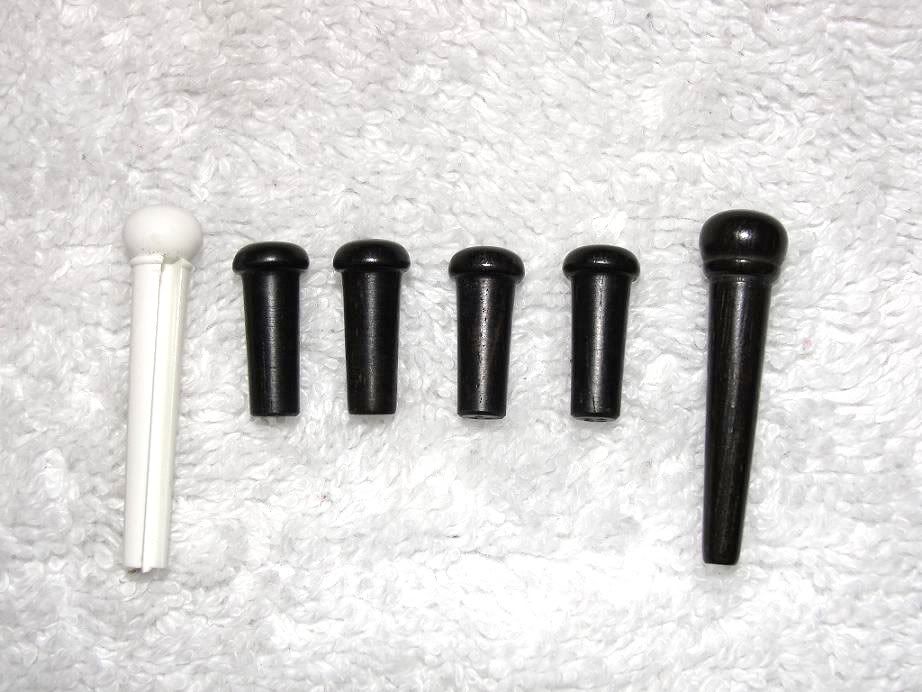
Here you can see the more rounded profile of the mushroom heads. The white plastic pin is one of the originals, the long ebony pin one of the extras from the set of six just purchased. Overall length of the new pins is just 15.5 mm, and they clear the knots by about 1/8" or so.

DSC03660.jpg


...top view:

DSC03676.jpg


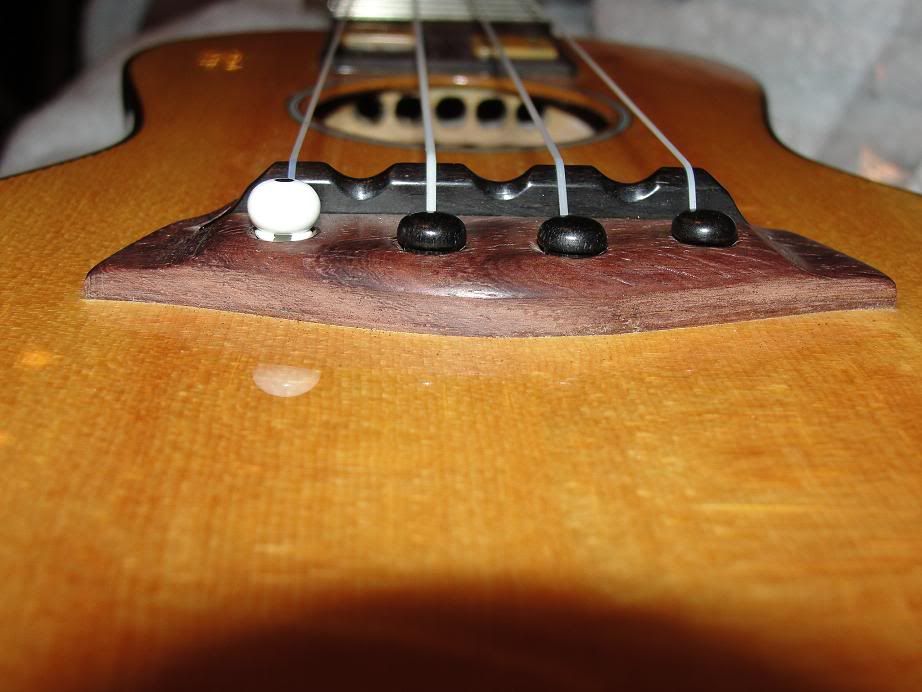
.....and the height savings over the original. With the factory bridge hole camphoring, there is plenty of room to get a thumbnail under the pin lip to lift them out when needed.

DSC03671.jpg


One other thing i will do when i change the strings is to rig a small sander to work off the small burs and splinters generated when the drilling thru the bridge and top was completed at the factory. Not necessary, but it will be cleaner and the string knots will seat faster. (and release easier when getting a string out)
You can see the splinters with a mirror and flashlight, and since this is a keeper i'll do the little extras.....
 
Last edited:
Finally got the damn strings in. Hopefully they wont pop out along with the pin. I am going to pick up some beads, as suggested, for the next time. Didn't realize what a pain it was working with that type of bridge set up. I'm used to the tie bridge. Thanks to all for your input.................Merry Christmas and Happy "Hangover" eh, I mean New Year............
 
Top Bottom