StewMac kit build out, first uke ever!

NotThePainter

Active member
Joined
Nov 24, 2019
Messages
29
Reaction score
0
Hi everybody. I started a build out in October, working some weekends, taking some weekends off. I'll go find the old pictures and post them up here.

Here I am, unpacking the box and laying out the cross braces. This was back in October. I stalled here because I didn't have clamps and I kept on forgetting to borrow my father in law's clamps!

IMG_0305.jpgIMG_0308.jpgIMG_0309.jpgIMG_0313.jpg
 
Weeks later I realized that I could use my stash of clamps and a "caul" to create a wide mouth clamp. The StewMac instructions talked about a caul but only in the context of using wide mouth clamps, just using it to hold more than one piece. Of course the caul can be used with multiple "normal" clamps. You can also see I made a clamping jig (aka a 2x4) to make attaching the clamps easier.

IMG_0831.jpgIMG_0832.jpgIMG_0833.jpgIMG_0835.jpgIMG_0836.jpg
 
I continued bracing and also build the body holder so I could do the end blocks and the top and bottom.

IMG_0837.jpgIMG_0839.jpgIMG_0843.jpgIMG_0853.jpgIMG_0854.jpg
 
Next was to glue the linings to the sides. I didn't have kerning clamps so I just used clothespins and rubber bands, that actually worked out pretty well in my opinion. I was upset when I saw than one of the lining shifted after being clamped but that was easy to sand down with 80 grit. I did follow StewMac's advice and pencil both the lining and the body and sand until the pencil was gone.

IMG_0871.jpgIMG_0873.jpgIMG_0875.jpgIMG_0877.jpgIMG_0878.jpg
 
Next step is to notch the linings and trim the cross braces so that the back can go on. Super easy. (Foreshadowing of the upcoming mistake...)

IMG_0880.jpgIMG_0881.jpgIMG_0886.jpgIMG_0888.jpgIMG_0885.jpg
 
I then put the 3 eye bolts into my uke-table so I could rubber band clamp the top on. I had problems with the top shifting a bit, getting all the cross braces into the notch so I did 2 testing fittings and then glued it. It turned out well.

Or did it? (more foreshadowing...)

IMG_0889.jpgIMG_0891.jpg
 
Sadly, when I got up the next day I found a gap between the back and the sides! One of the cross braces didn't fall into it's notch. I was pretty bummed. But I googled around and found this forum, posting this thread.

https://forum.ukuleleunderground.co...k-not-properly-attached&p=2193441#post2193441

I'm not going to repost all the pictures, but lets just say it all worked out.

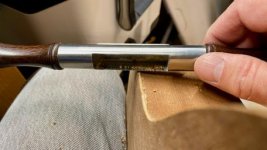
After that distastes was dealt with I had to trim the overhang away, getting to use some of the spoke shaves (or is one a draw knife?) that my father in law lent me.

IMG_0901.jpgIMG_0903.jpgIMG_0904.jpg
 
My basement is cold, I wear a knit cap down there but I don't need a jacket. Tight bond needs 30 minutes to set, clamped, and StewMac recommends 45 minutes. I've been doing an hour. I had a house hold project to do today and that involved some rough carpentry, I needed to shim some stuff so I clamped that after I clamped my uke. I was't careful and there was a lot of glue oozing out. I was really surprised to find, 45 minutes later, that much of the glue was still tacky.

I guess I could up the drying time to an hour and half but that will really slow down the project. What do you all do when your workshop is cold?
 
Tight bond needs 30 minutes to set, clamped, and StewMac recommends 45 minutes. ...I guess I could up the drying time to an hour and half but that will really slow down the project.

I think you are playing with fire using such short dry times. If you look on the directions on the back of your glue it says that Titebond doesn't reach its full strength for 24 hours and that is at room temperature. I use a minimum of 3 hours for non-stressed joints and 1 day for stressed joins like bridges and necks. Slow down. Be patient. The uke will get built eventually.

What do you all do when your workshop is cold?

I have two shops: An outdoor shop for cutting operations with machines and such and an indoor shop for fitting and gluing and such. The outdoor shop can be freezing but the indoor shop is toasty warm (and dry).
 
I don't think there is an issue with unclamping after an hour or so, but you shouldn't do anything that would stress the joint for 24 hours. If it's a case where the parts on whatever you're building need to be clamped tightly to pull the joint together, then you should probably leave it clamped for 24 hours. But that is a situation that should be avoided if at all possible, as parts should be made to fit well in the first place.
 
I think you are playing with fire using such short dry times. If you look on the directions on the back of your glue it says that Titebond doesn't reach its full strength for 24 hours and that is at room temperature. I use a minimum of 3 hours for non-stressed joints and 1 day for stressed joins like bridges and necks. Slow down. Be patient. The uke will get built eventually.

I was just reading the StewMac instructions which said 30 minutes and I thought I was being good doing 45!
 
I don't think there is an issue with unclamping after an hour or so, but you shouldn't do anything that would stress the joint for 24 hours. If it's a case where the parts on whatever you're building need to be clamped tightly to pull the joint together, then you should probably leave it clamped for 24 hours. But that is a situation that should be avoided if at all possible, as parts should be made to fit well in the first place.

My carpenter friend told me how they would distress finely honed surfaces so the glue would have a void to fill and hold! So yeah, if it needs tight clamping, that's a problem. I know that now. I'm already thinking of my 2nd build.It might be awhile though...
 
Move your things to a warmer place when gluing/clamping. Also be aware that Titebond original shouldn't be used below 50 F. My basement shop is hovering around 60 F now.

I did that today when I put the front on.

IMG_0968.jpg

I was so careful, looked half a dozen times to make sure it was seated. I'll take the rubber bands off tomorrow so I guess I just have to wait. Oh, and it was good that it was upstairs. One of the bands let go! I tied it poorly. We thought it was the cat doing something naughty but she was right next to us. So I checked the uke and the 2nd rubber band was all akimbo. Good that it was upstairs with us!
 
what am I doing wrong with pictures? I resized that so it was 900 pixels but still it is tiny... Grrr...
 
goodDots.jpgIt has been while since I posted anything about my uke, I had some holiday stuff to do but I did get a few days in. Here's my current set of updates and of course with a few questions.

First thing I had to do was install the plastic side dots. I used my drill press to make nice precise holes but I still screwed up the double dot. I have no idea how that happened. The good news is that I also put them on the wrong side! So a lefty will see the screwed up doubles but a righty won't. LOL.

drill.jpgmisregisteredDots.jpgsideDotsDrilled2.jpggoodDots.jpg
 
Next I installed the frets.

That actually went pretty well except I didn't have a nipper so I headed out to Home Depot to get one! (I thought I had one, my wife gave me a bunch of fretting tools a few christmases ago but this was my first time using them.)

The frets are mostly dressed, but I've not completely rounded the burr off the edges, the StewMac instructions, for some odd reason, say to do that later. Maybe the edge get messed up when you shape the neck, that could make sense.

fretsCut.jpgfretsInstall.jpgfileFrets.jpg
mostlyDressedFrets.jpg
 
I next finished the top and back edges with a spoke shave and sanded. It looks pretty good except that I screwed up and got a tear out! It looked pretty awful but when I did my final sanding it isn't horrible, I'll just call it my Persian Flaw. You can see it, sanded, in the close up.

tearOut1.jpgtearOut2.jpgsanded.jpgpersianFlaw.jpg
 
So here's question number 1. The StewMac instructions said to put some wax on the fretboard so the super glue for the frets didn't soak into the wood. As you can see my from photo I got plenty of soak in on the sides, but that's because I waxed the front! I'm not sure this was correct. So the question is, if I go to finish the front will I have to remove the wax?

oddGlue.jpg
 
Top Bottom